Rustico Planter Fountain
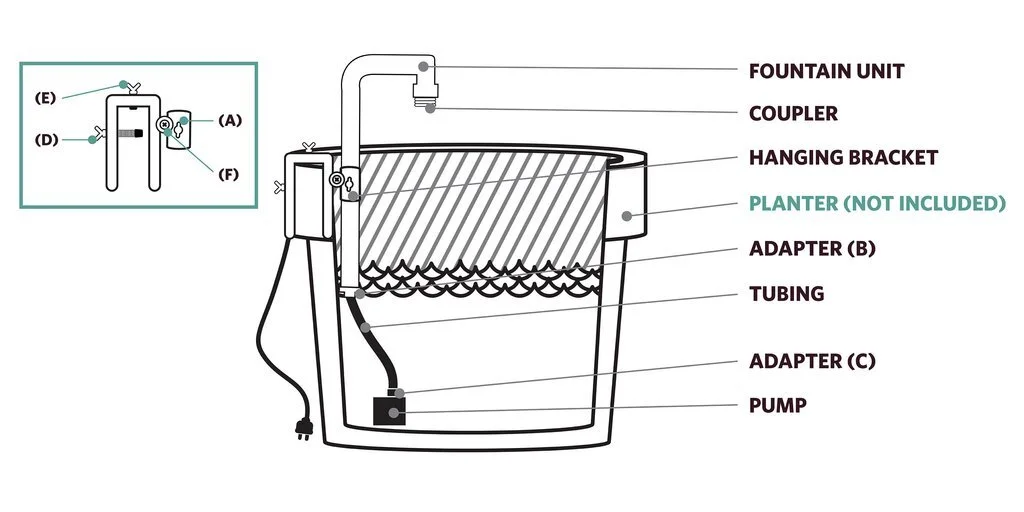
Project Anatomy
Suggested planter size: 12-20 in. diameter
Project Step-by-Step
Slide hanging bracket onto fountain unit, facing away from the fountain head, and fasten tightly with wing nut (A).
Connect adapter (B) to the bottom of fountain unit.
Connect tubing to the fountain unit adapter (B).
Connect tubing from fountain unit adapter to the outlet of the pump adapter (C) so the pump is in the planter.
Place the power cord within the cord management channel of the hanging bracket so the cord is running out the back of the planter.
Place the hanging bracket on the lip of the planter and fasten securely using a wing nut (D) on the back and another wing nut (E) on the top, do not over-tighten. NOTE: Using the hanging bracket, adjust the fountain unit to a 90-degree angle and tighten the screw (F) with a Phillips-head screwdriver.
Fill the planter with water until 2/3 full, plug in, and enjoy!
* NOTE: Please allow a few minutes for the pump to prime and run normally.
Project Tips
Every planter fountain is different! For best results, refer to the product packaging or instruction manual for recommendations.
Once assembled and running, add aquatic plants and small fish as a final touch.


